How to Use Yext
Integrating Yext into The CRM platform offers a streamlined approach to managing your online listings across 150+ websites, enhancing SEO, and boosting your online presence. Here’s how to get started and leverage the new features recently announced.
Step 1: Creating a Yext Account through The CRM
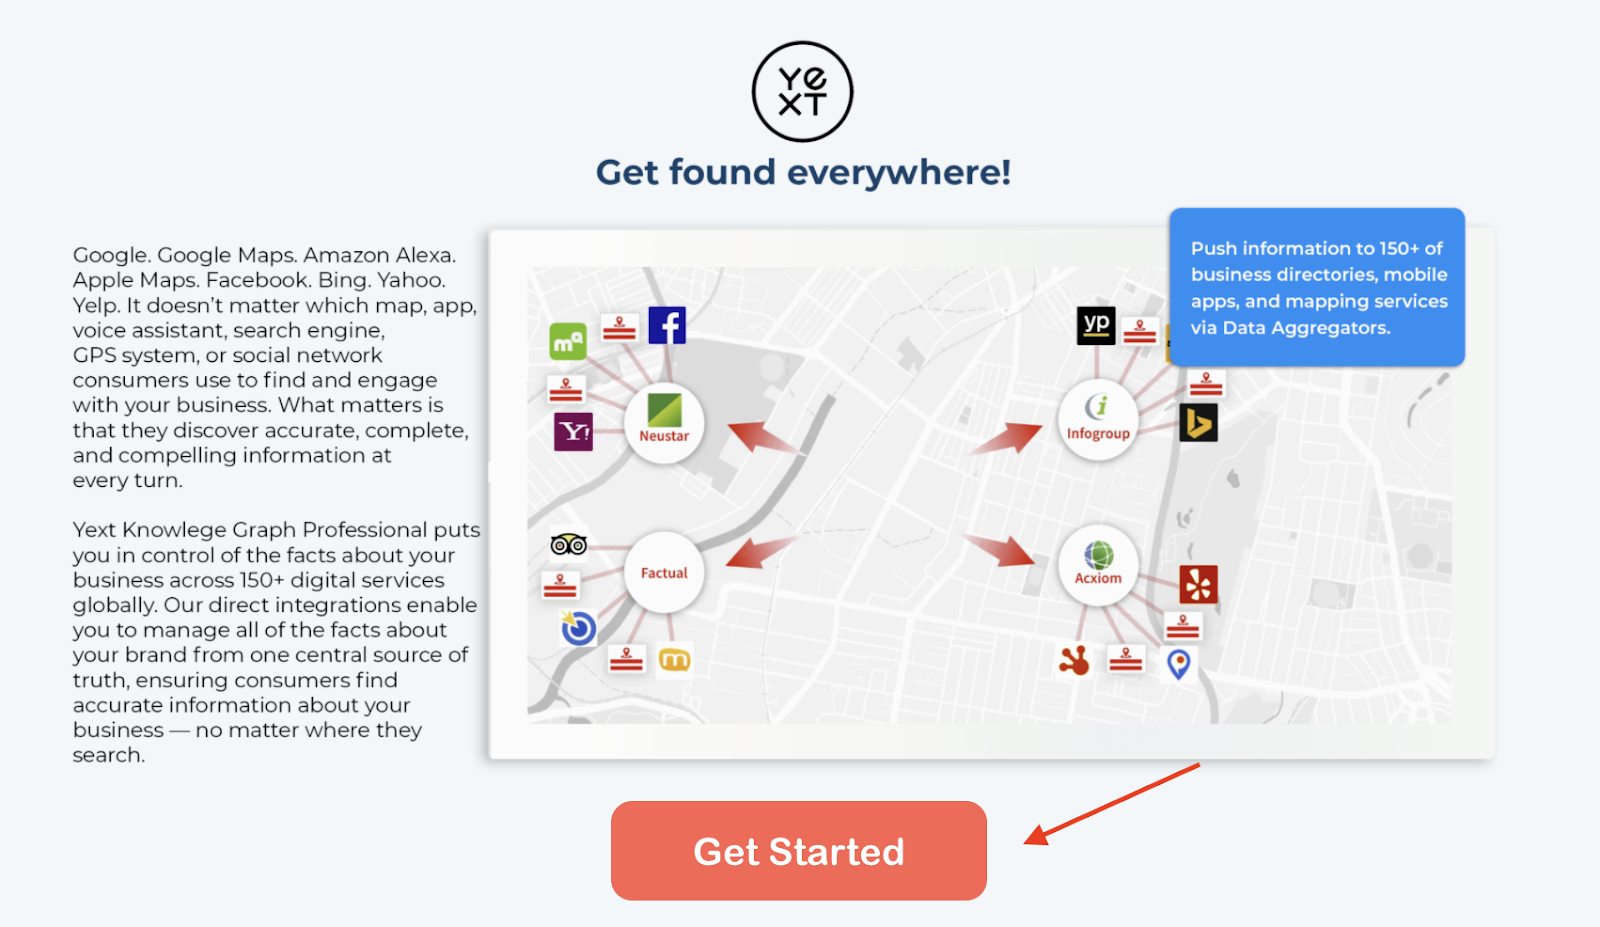
Navigate to Online Listing: From your Dashboard within The CRM, locate the Online Listing option. This new menu item is part of the integration designed to facilitate easy access to Yext services.
Initiate the Setup: Click on “Get Started.” This action opens a window or popup where you begin the process of integrating Yext with your account.
Fill Out Your Information: You will be prompted to fill out essential details for your Yext listing, including your business’s name, address, phone number, and website. This information is crucial as it will be pushed out to over 150 websites automatically.
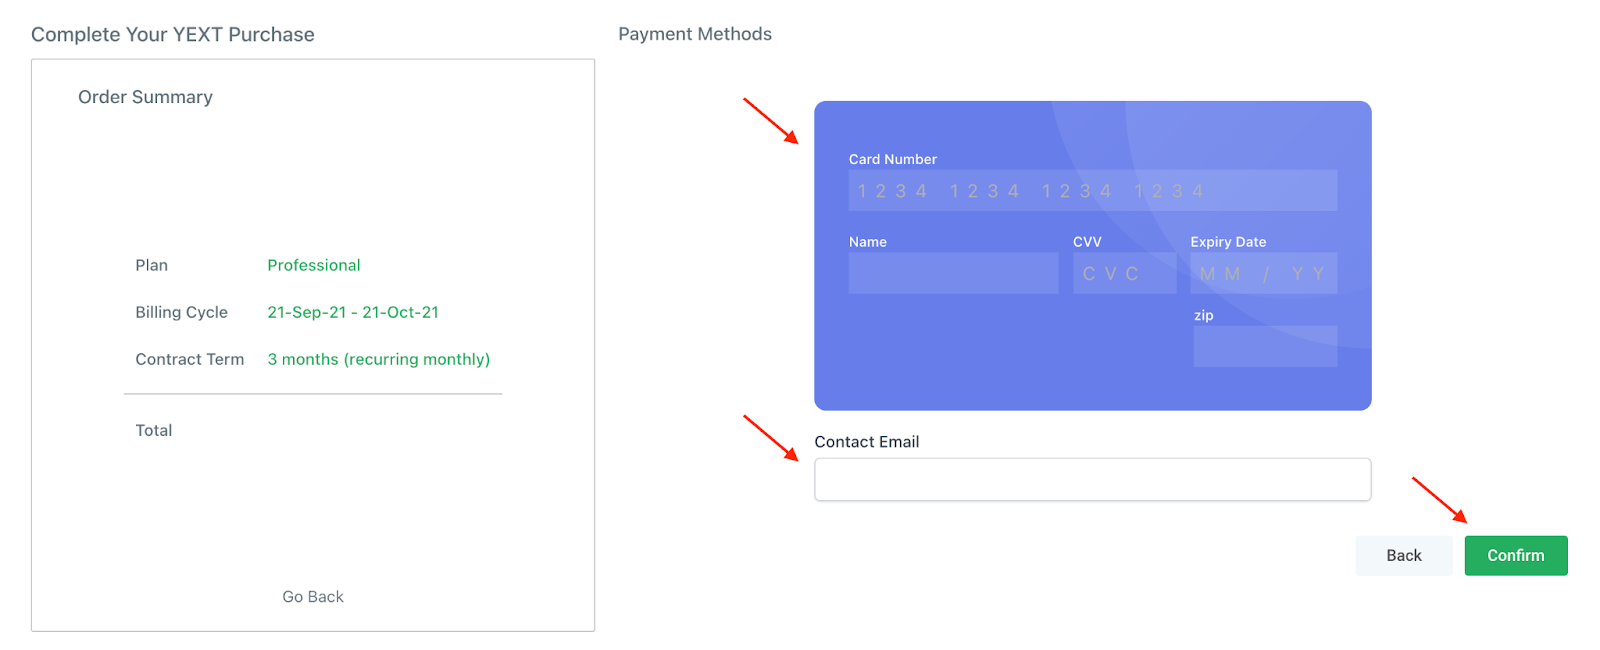
Complete Payment Information: Enter your payment details and email address to finalize the creation of your Yext account. The CRM may offer special pricing for Yext, so ensure to review the pricing options carefully.
Confirmation: Once you've filled in all the necessary details, click on “Confirm” to finish setting up your Yext account directly through The CRM.
Step 2: Viewing and Managing Your Yext Data
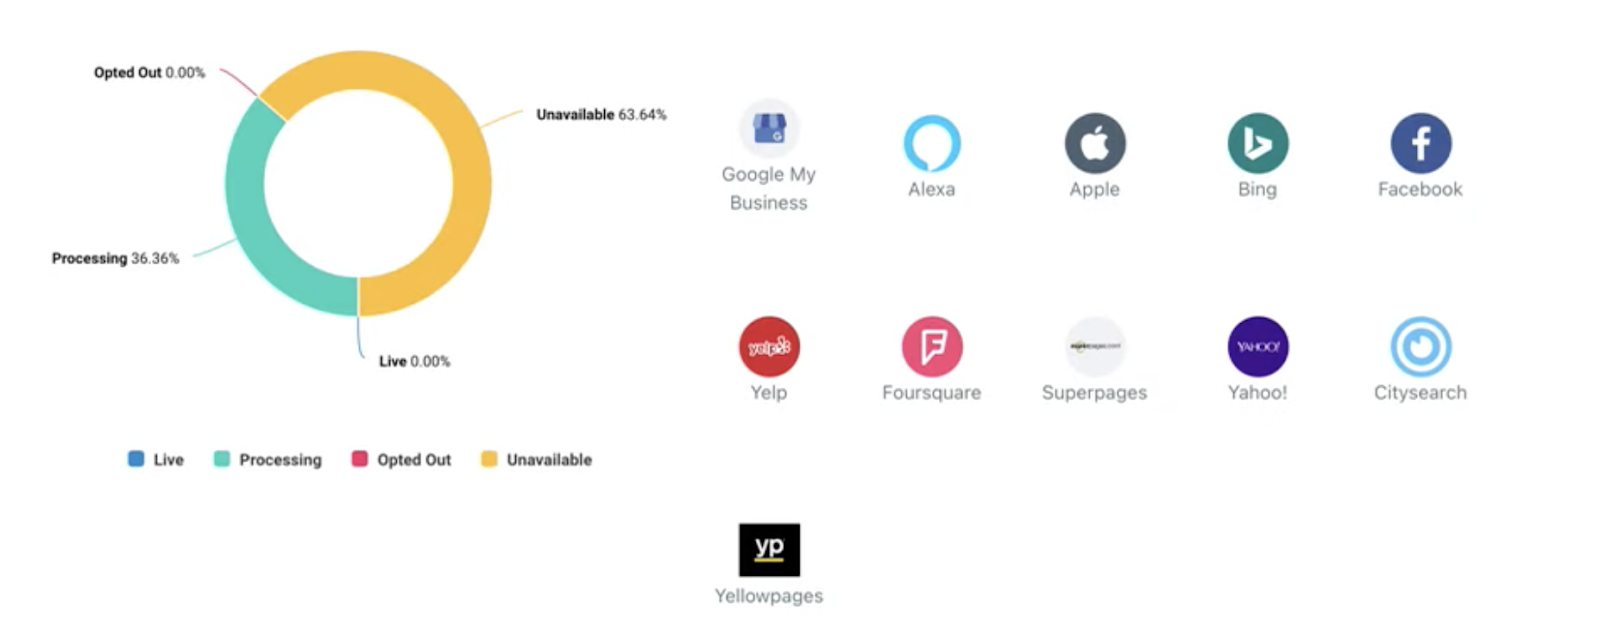
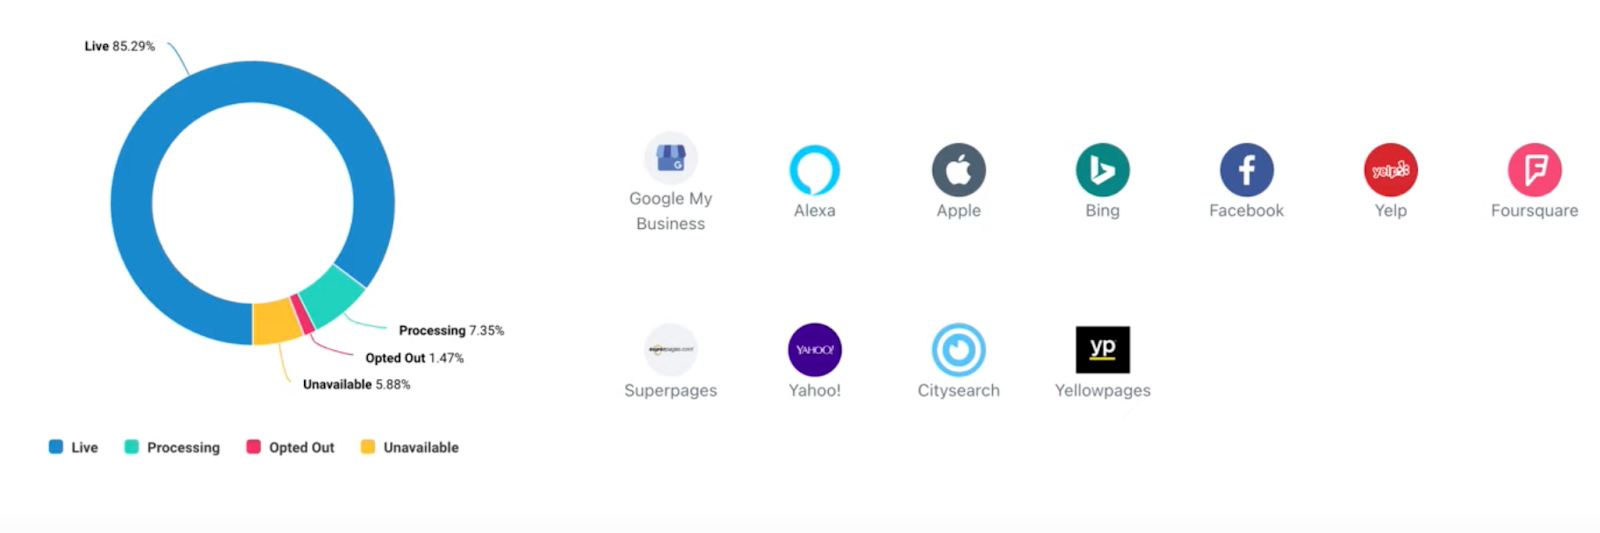
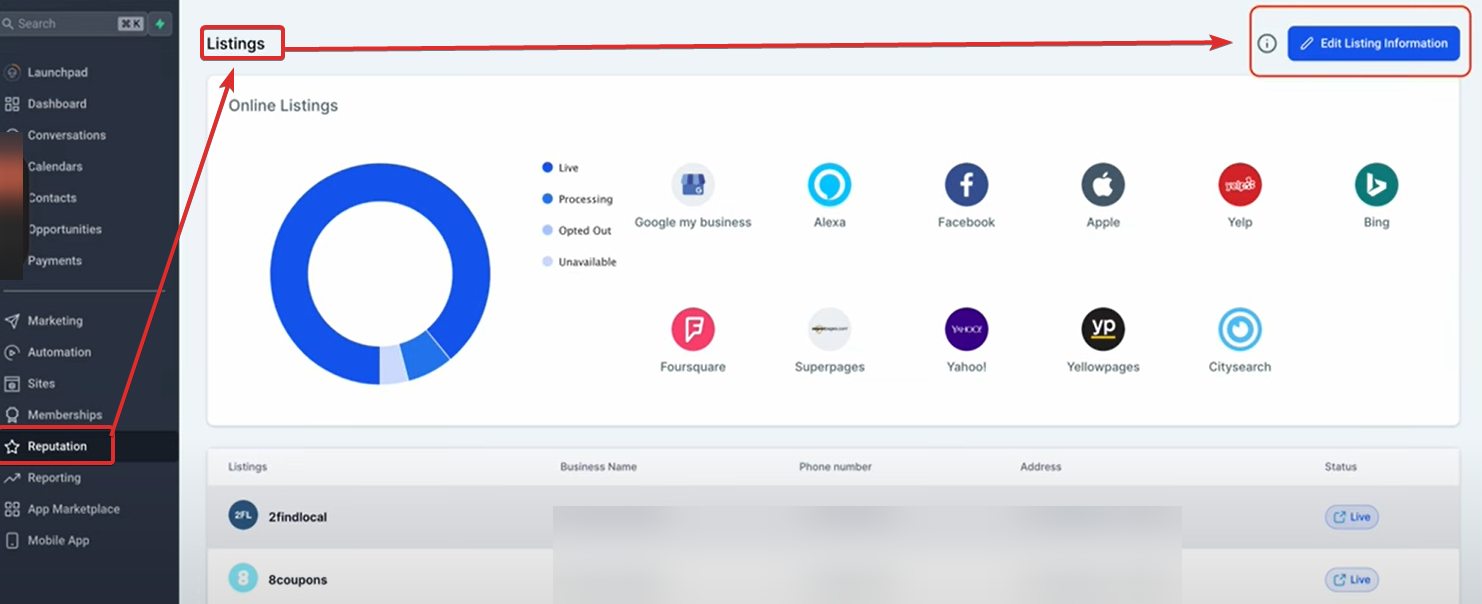
Access Online Listings Page: After creating your account, go to the Online Listings page within The CRM. Initially, your information might be processing, indicated by a graph and icons showing most data as “Processing” or “Unavailable.”
Review Live Data: Within about 48 hours, your listings will go live, and you can see the majority of your information marked as “Live.” This rapid deployment is part of Yext's SEO strategy to enhance your online presence swiftly.
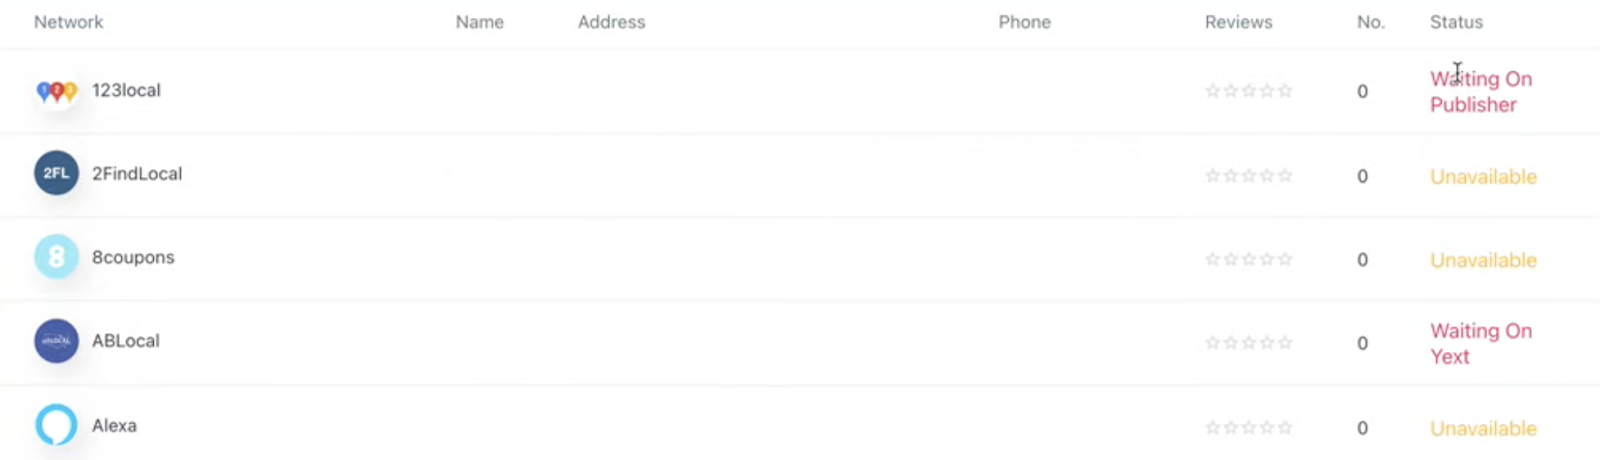
Monitor Network Statuses: Scroll through the individual networks and their statuses to assess how Yext is improving your online visibility.
New Features and Enhanced Management
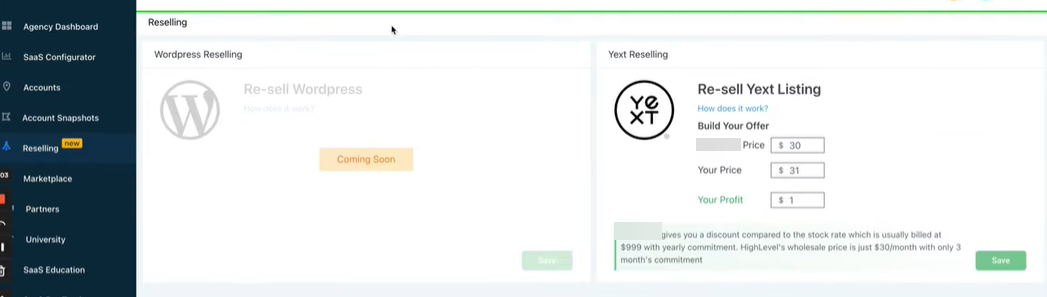
Agency Settings for Yext: Inside The CRM, agencies can navigate to settings under the reselling options to find Yext. Here, you can set your pricing for clients, making it a valuable recurring service offering.
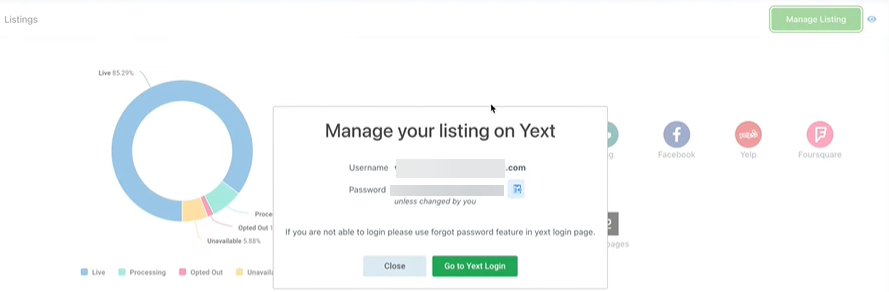
Managed Listings: For listings that are active, you can manage them directly by clicking on “Managed Listing” next to the respective listing. This feature directs you to Yext, where you can update and manage listings with ease. Remember to use the “Copy Password” function for seamless login.
Why Use Yext with The CRM?
Automated SEO Boost: Yext's integration allows for an automatic push of your information across a vast network of sites, enhancing your SEO with minimal effort.
Control Over Listings: Continuous use of Yext through The CRM ensures you maintain control over your listings, preventing unauthorized changes and keeping your online presence consistent.
Monthly Recurring Revenue: For agencies, this integration offers a streamlined path to generating recurring revenue by offering valuable SEO services to clients.
Steps to Cancel Yext Listings:
Navigate to the Yext Listing Management: Within The CRM, go to where you manage your Yext listings. This area gives you an overview of all active listings and their statuses.
Select the Listing to Cancel: Choose the specific Yext listing(s) you wish to cancel. This action can be part of a broader strategy to update or modify your SEO efforts as needed.
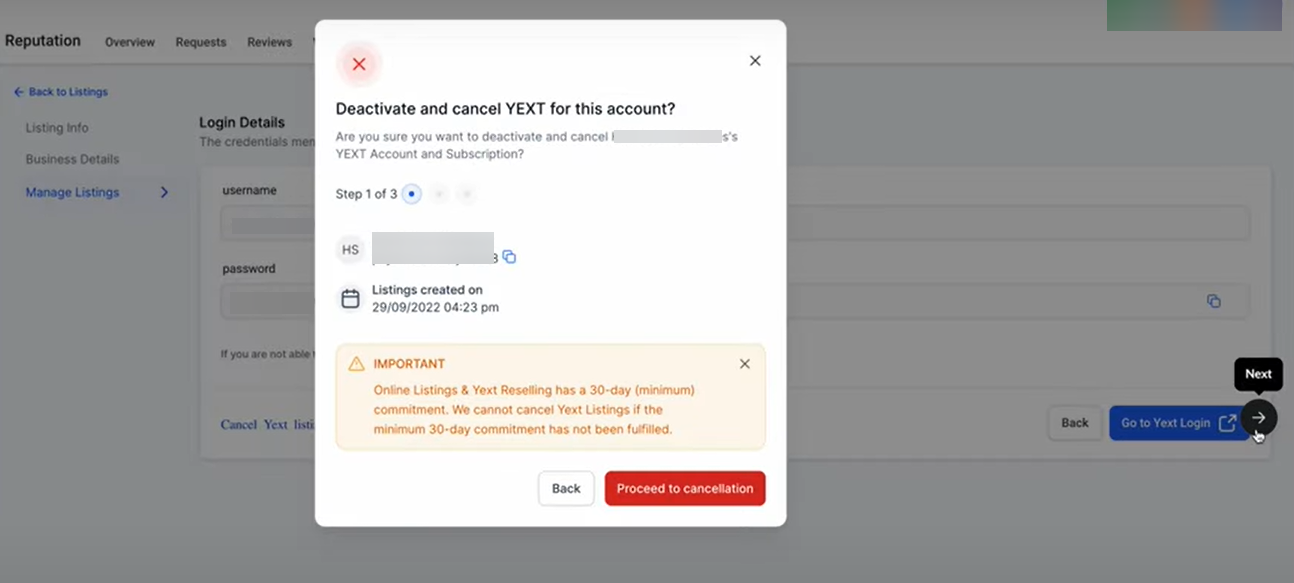
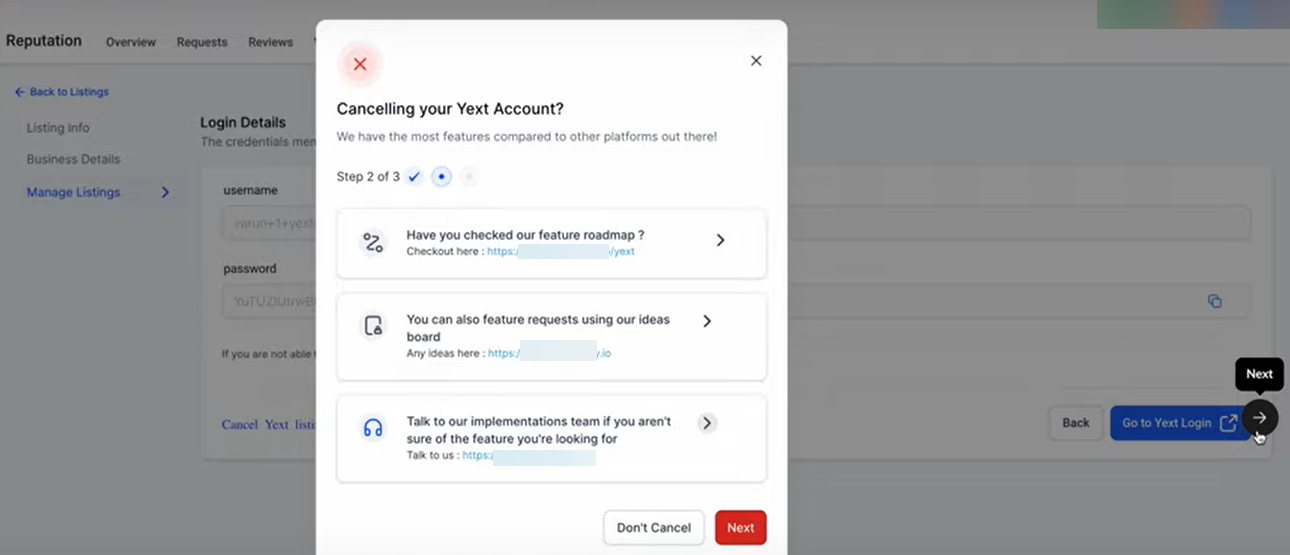
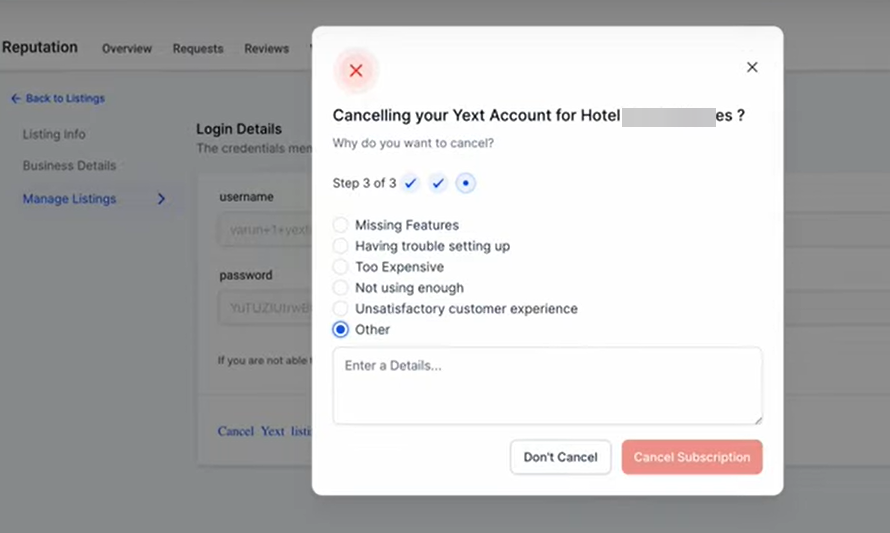
Initiate the Cancellation Process: The CRM has introduced a simple flow to cancel your Yext listings. Look for the option to "Cancel Listing" or a similar command that initiates this process.
Automate Cancellation in Workflows (Optional): If desired, you can integrate the cancellation process into your automated workflows. This feature is particularly useful for managing listings at scale or as part of a service package adjustment.
Important Considerations:
No More Listings Removal: It's crucial to note that Yext no longer removes listings upon cancellation. This was a practice that ceased over five years ago. Now, when a Yext listing is canceled, Yext simply stops managing it. The listings themselves remain intact, which means the SEO benefits you've gained will not be undone by cancellation.
Updated Commitment Period: Previously, a minimum commitment of three months was required for Yext listings. The CRM’s new cancellation feature reduces this commitment to just 30 days, offering more flexibility and ease for agencies managing their clients' SEO strategies.
Why Cancel?: The option to cancel Yext listings gives agencies and businesses the flexibility to adapt their SEO and online presence strategies as their needs evolve. Whether due to budget adjustments, changing marketing tactics, or the end of a promotional period, this feature ensures you can manage listings efficiently without being locked into a long-term commitment.
Yext's partnership with The CRM provides a powerful tool for businesses and agencies alike to enhance their online presence and control their digital footprint with ease and efficiency. Follow these steps to get started and make the most out of your Yext integration.Moreover, The introduction of automated Yext listing cancellation within The CRM signifies a step forward in providing agencies and businesses with greater control and flexibility over their online presence management. By simplifying the cancellation process and removing outdated constraints, The CRM empowers users to tailor their SEO efforts to their current needs and goals. Whether you’re adjusting your strategy or ending a campaign, this feature ensures a seamless transition.